Mini-Project Name: Raised Garden Bed Building
Goal: Complete 6 of the 8 planned beds by May 1st
Objectives:
- Try my hand at my own raised garden bed design & building
- Most efficient use of materials & money
- Build them “seat height”
The Design:
There are loads of great raised garden bed designs out there – I scoured the web and gathered all the designs I liked best and ended up building the bed shown below:

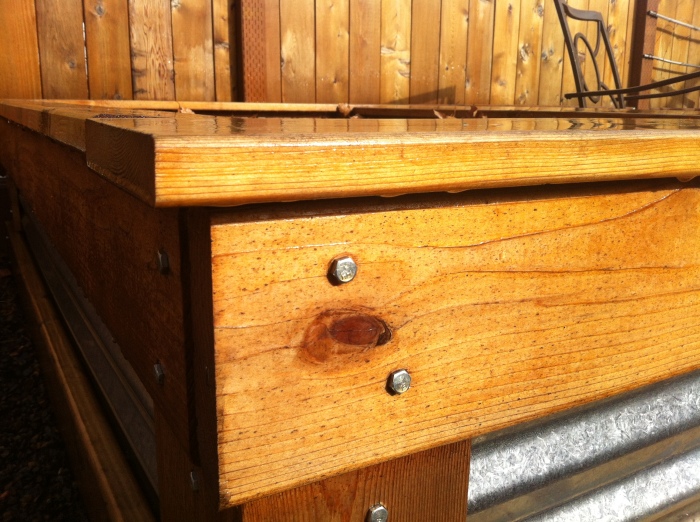
I haven’t installed the Top Trim yet, I want to get all of the beds in place first. The intent of the Top Trim is to give it a more finished look and also provide a place to sit and place things. Since it’s not required to get the beds to the point of accepting dirt, I’m holding off for now. I also want to think more about how I can put in brackets to hold PVC tubes for future Hoop Covers.
Here is how the materials broke down for 1 – 8′ x 4′ x 18″ bed – overall I’m pleased with materials cost!
I ended up getting 6 beds almost finished (additional 4’x4′ and 8’x4’not shown below), now I’m playing around with the layout. My orignal plan called for the beds to be placed East/West (left image below), but after putting them in place and doing some more web research on optimal positioning – I think I’m going to try to have most of them orientated North/South (right image below). The theory is that the plants will get a more even exposure to the sun. (Also, there is a more “finished’ looking side to the bed and I think I want that facing the house – form and function are important!) The frame are easy for 1 person to move so I’m having fun with different layouts.
 I’m VERY happy with the progress I made on Sunday. I spent about 2 hours material shopping in the morning, and another 6 hours building. Once I built the 1st bed I cut all the wood for the other 5 and assembly of the frames was pretty quick.
Cutting the galvanized steel sheets was a bit of a challenge. The helpful guy at Lowest gave me a tip. He said if I bought the saw blade shown below on the left, and install it backwards, that I could rip the sheets like butter. I tried it and it worked! I used tin snips to cut the sheets down to the length – if you try this wear full face protection (you best ALWAYS be wearing eye protection), learned this after hot metal shard stuck in my cheek, and also wear thick gloves.
The rains came back in on Monday, I’m hoping for some evening rain breaks so I can finish the existing 6 beds and maybe even build the remaining two. I would love to get dirt for delivery this weekend!
Trim Update:
I never did circle back and show how the trim turned out….see below for a detailed view!


Impressive progress!
Thanks! I was surprised how much I got done, I wasn’t rushing, just plodding along. I guess it’s all in the “planning”!
I don`t know what are you doing working on software… You are a real HARDWARE girl!
I am multi-talented by friend… 😉
I Like! Come on over to my house.. One bed should take you about 30 min?
I dont see the images anymore.
So how did you do the irrigation?
Hi! Sorry for the late reply! I laid out PVC grid under all the beds and put risers in each bed. On each riser I put a control valve so I could just shut off the bed if needed.
I connected the whole system to a timer on an outdoor faucent. In each bed I did something different based on the planting. In some beds I have soaker hoses, in others drip systems with various types of emitters.
I need to do a post on this – thanks for the reminder!
How did you distribute it?